The Coolbest 8-Step Aircon Servicing Process
Every Coolbest technician follows the same 8 steps on every job. No skipped corners, no surprise add-ons. Here's the full sequence.
A consistent process is what separates a proper aircon service from a quick wipe-down that calls itself one. The same eight-step routine sits behind everything Coolbest Aircon does on a servicing visit — single-unit or six-unit, HDB or condo, S$50 or S$115. Here’s exactly what happens. If you want the line-item breakdown instead, see what’s included in standard servicing.
Step 1: Pre-visit checklist and quote confirmation
Before the slot is confirmed, we collect three pieces of information by WhatsApp: the number of fan coils, the brand and approximate age, and your postal code. From those we quote the exact price and slot window — usually within an hour of your message during business hours.
The quote is final unless something on-site changes the scope. If we discover a fault that needs separate work (chemical wash, repair, gas top-up), we pause and quote it in writing before continuing.
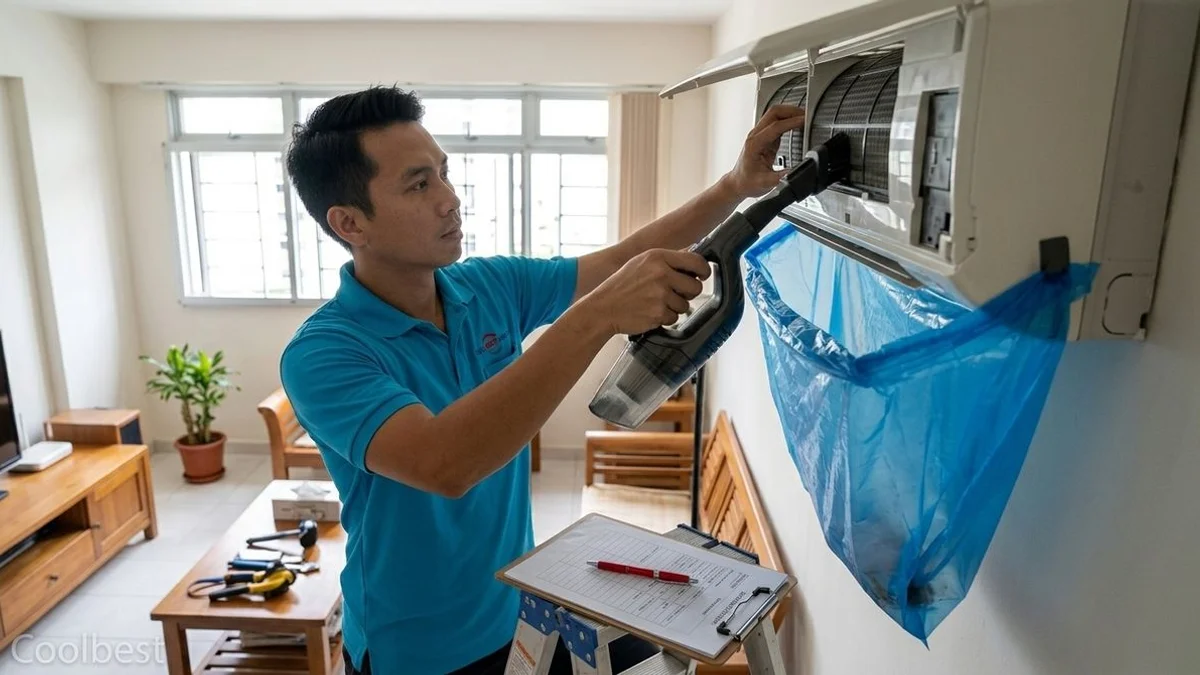
Step 2: On-arrival inspection and dust-sheet setup
The technician arrives in branded uniform, removes shoes at your door, and lays a dust sheet on the floor under each indoor unit. Furniture immediately below the unit is covered with a second sheet.
We do a 60-second visual on each fan coil — checking for visible mould, water marks, and physical damage — before opening anything up. If we spot something that suggests a chemical wash or repair is needed, we mention it now rather than at the end.
Step 3: Filter removal and deep rinse
The filter slides out from behind the front louvre. We remove it, rinse it with clean water at the kitchen sink (or in the bathroom if more practical), and brush off any caked dust. The filter goes back in only after the next steps are complete.
Step 4: Blower wheel wipe-down
The blower wheel — the squirrel-cage barrel that pushes air across the cooling coil — is the part homeowners can’t easily reach. We use a soft brush and a damp microfibre cloth to wipe each blade. This step alone restores 5–15% of cooling efficiency on a unit that hasn’t been cleaned in 3+ months.
Step 5: Drain pipe flush and leak test
The drain pipe carries condensate from the indoor unit’s drain pan to an external outlet. Over months, biofilm builds up inside the pipe and slows drainage. We flush the pipe with pressurised water, watch the outlet for free-flowing discharge, and check for any leaks at the join inside the unit.
A blocked drain is the cause of about 40% of “water dripping from aircon” calls. Flushing it during routine servicing prevents that emergency entirely.
Step 6: Refrigerant pressure reading
We connect a manifold gauge to the service port on the outdoor condenser and take a pressure reading. The reading is cross-referenced against the manufacturer’s pressure-temperature chart for the specific refrigerant (R32 or R410A) and the current ambient conditions.
If pressures are within spec, we make a note and move on. If they’re 10% or more below spec, we mention it — not as an upsell, but so you know there may be a slow leak that warrants a follow-up pressure test in the next service.
Step 7: Post-service cold-air verification
With everything reassembled, we power the unit on, set it to maximum cooling, and let it run for 5 minutes. We then measure the supply-air temperature at the louvre with a probe thermometer. A healthy unit produces 12–15°C supply air at a 23°C setpoint.
If the supply temperature is too high, we know something is still off — typically a hidden refrigerant issue or a coil that needs a chemical wash beyond what routine servicing can do.
Step 8: Photo report and 90-day warranty sign-off
On request (just ask before the slot), we take before/after photos of each fan coil and email them to you. The technician fills out the warranty card with the date, the work performed, and the 90-day expiry. You sign, we leave one copy with you, and we file a copy at the office.
Why eight steps and not five
The shortcut version of an aircon service skips the drain flush, the pressure reading, and the cold-air verification. That’s why “S$30 per unit” services exist — they take 15 minutes per unit and do four steps. The trouble shows up in 4–6 weeks when the issue the shortcut missed (slow drain, falling refrigerant) becomes an emergency call.
Eight steps takes 30–40 minutes per unit. The cost difference between five steps and eight is small. The reliability difference is large.
Book the 8-step service
WhatsApp +65 9182 5233 with your unit count and postal code. We’ll quote the slot and the exact per-unit price within the hour during business hours.